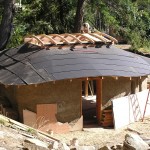
 As we move into the first week of October, it remains the driest summer on record here on the west coast, parching the gardens, drying up wells, and raising the fire danger all around us. The one thing that the clear sunny skies have been perfect for is drying out the cob walls of Colin’s workshop and giving us lots of time to get the roof on and the walls protected for when the rains finally do pour down. In the meantime, Colin is splitting all the cedar shakes that he needs for finishing the roof, and I am getting ready to start troweling on the scratch coat of earthen plaster on the walls.
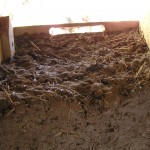
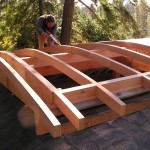
The construction of the roof began with the laying of the rafters onto the top of the cob walls, radiating outwards from the central post and beam structure that stands in the center of the workshop to support the large skylight. We embedded “deadmen” (inverted wood T’s) into the top foot of the cob walls every two feet, and attached the rafters to these for extra tie down support. Then we had a small amount of cobbing left to do- filling in around the rafters up to a finished height that closed in a small vent on the outside edge.
-

- rafters set on cob wall
-
- roof vent
-
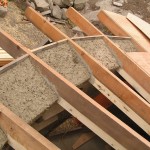
- rafters embedded, with 2 foot overhang
-

- setting the undulating rafters
-
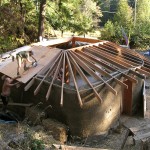
- radiating rafters
-
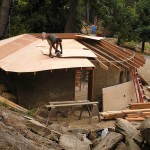
- patchwork plywood
-
- skylight framing
-
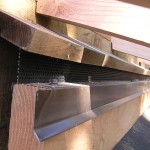
- side vent for roof
-
- laying down the skylight shets
-
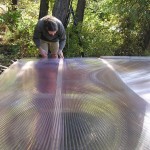
- lining up the skylight sheets
-

- cedar top strip
-
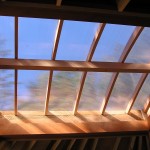
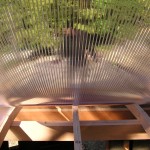
- inside the skylight
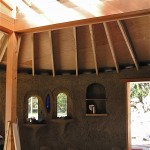
Colin had in mind an undulating roof line as well as a curving roof line, so the top height of the walls swept up and down as they went around in the circle, making the rafters swoop above doorways and dip into corners. Placing plywood over the rafters required half inch as well as quarter inch plywood, doubling up the quarter inch in the places where it needed to bend around corners and into the dips, giving the roof a plywood patchwork look. We then rolled out lengths of roofing felt and started on the skylight.
Traditionally, cedar shake roofs don’t need any plywood or roofing felt. The shakes can be nailed right to strapping over the rafters. Because we are building a permitted building with unconventional materials with approval from an engineer in a seismically sensitive zone, well, we had to do it. It was stated that the plywood helps to distribute the load of the roof on the load bearing walls, uniting the roof and reducing the amount of pressure directly on the walls.
The skylight required a little more finessing in terms of design. Basically, a system of nine ribs curve over a center beam, with double walled polycarbonate sheets bent over the ribs, and cedar strips screwed down on the top. Lots of details in between, of course, but that is the basic construction of the 8×12 skylight. There is plywood filling in the ends of the skylight, and roof venting along the sides that moves the air through from the vents at the other ends of the rafters. We will be filling the inside of the ceiling with rock wool insulation, leaving a two inch gap at the top of the rafters for this passage of air.
The light inside is a beautiful diffused brightness, and the gentle curves and waves of the roof line is complemented by the surrounding slope and roll of the bedrock, the arch of the lifted skylight echoes the balanced curve of the strawbale house above it. The moments of standing and looking at the very real outcome of what was an imagining is almost surreal, as if we were imagining what was already there and had just failed to notice it before. We still have an extensive list of big and small jobs to do before the workshop is usable, or finished, but having the foundation up to the roof constructed and becoming a part of our landscape is an amazing accomplishment. Thanks to many helping hands, encouraging words, and loads of summer fruit dropped off by generous neighbors!